Posts

Showing posts from May, 2022

Dismantling the hanging wardrobe from the starboard side of the cabin
Image
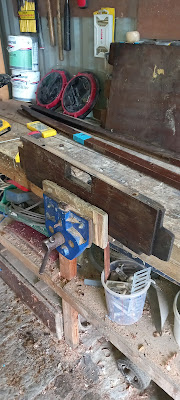
The wardrobe in the main cabin is made up of various parts which have to be taken apart and cleaned up. This photo is the bottom part of the lower part of the front of the wardrobe   The dowels which were in the two halves of the lower part were broken and now been drilled out so that new dowels can be made before gluing the two halves together.As before they were just dry fitted together   The two lower panels have several mortise and tenon joints on them which will have to be remade on the two vertical parts that make up the door frame.   This photo shows the tenon joints and the amount of mortises that have to be recut in the two vertical parts that make up the fdoor frames The old vertical parts which are broken which are going to be remade  The triangle panel which makes up the shaped door that goes in inside this wardrobe front panel   

More of the jigsaw puzzle to sort out and repair as possible and remake if needed

Image
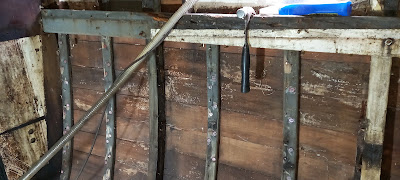
This piece is the front of the hanging wardrobe in the main cabin has you come down the steps on the starboard hand side   This is the forward bulkhead to the hanging wardrobe which is going to be replaced, the only restorable part is the front rail which is the forward part of the wardrobe front, which will need carefully removing off the bulkhead.  More of the jigsaw puzzle to be sorted through over the next week to see what can be salvaged from the parts which were brought back from Chance at Woodplumpton   The chart table and the drawer unit which needs a good clearing down and repairing as necessary and then varnishing and painting before it is put back in place once the wheelhouse is sorted and repaired as necessary  Another pile of parts that need sorting out   

Chance undergoing a pervious failed restoration

Image
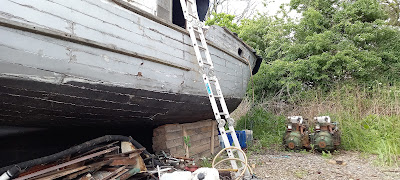
This is Chance undergoing a pervious Restoration which failed to get finished as the owner at the time did not have the funds to complete the restoration it needed. A fair amount of the planking which needed to be replaced at the time was done,however , it was not completed as the then owner did not have the funds to keep doing the restoration and the boat was moved and worked stopped and the boat deteriorated to it present condition.   Some of the work was started but not completed as in the case of the transom where at the time the starboard side was done. A fair bit of planking was done on the starboard side both above the waterline and below   

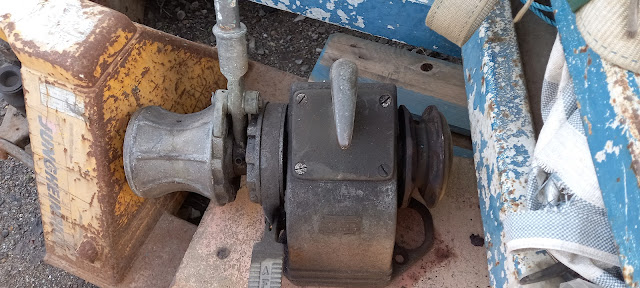
Chances windlass, one of the parts that as survive the passage of years and is still with the boat

Image
The first job with the windlass will be to give it a good cleaning down and check all the moving parts for wear and if any is find get the parts remade to fit the windlass  On the manufacturers plate it is a AFCO Marine Windlass  It is not likely that the company still is in existence, however, their windlass is still in god condition after all these years.  Once the decks are relaid it will once more be put back in its original position on the foredeck and will be put back into commission and used again   

Grinding off the nails heads to release the ribs and the planks so we can remove both the rotten planks and the broken ribs

Image
The first stage in getting rib of the rotten planks and broken ribs, take an angle grinder to the ribs and grind the heads off the nails so we can punch out the nails Before we can punch out the rib nails the hull had to cleared of all the paint on the hull so that the filler over the nails can be removed so stopping any splits in the good planks when the nails are punched out of the ribs  A slow but necessary job which my brother John did while he was over from Leeds for a few days helping us get on with the other parts of the restoration   It was found that some planks had been nailed on others had been screwed in place and others had been nailed on with copper nails and roves but the roves had not been cliched over.  

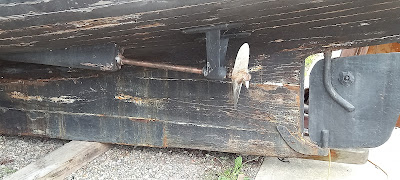
Cleaning up the portside propeller Shaft & the propeller to find out the diameter and pitch & the manufacturer of the propeller

Image
Chance like a lot of James Silver / John Bain designed boats at the time Chance was build, they were twin screw single rudder designed.  The stern gear glands were of white metal and were very close fitting glands The original propellers that were fitted when Chance was originally launched in 1948 The original manufacturer of the propeller can be seen as Thornycroft   On this photo is can be seen that the diameter is 17 1/2 " x 12 1/2" These propeller shafts will have to be removed as there is work to be done on the stern tubes and the bearing changed to modern stern gear when Chance is re-engineered   

The big difference a few days make after removing the old paint off the hull to see the extension of the amount of planking needing to be replaced

Image
Before I started on the hull  Doing a test patch with my large sander with P40 girt sandpaper, it cut through the old paint well to leave a good surface below which will need a little light fairing once the new planks are fitted  Doing a bit of the port side to get the hang of the speed and the amount of changing discs  Then I made a start on the starboard side, to expose the fixings so that the to drill out the old putty out of the nail holes to stop any breaking out of the planks as the nails are punched out of the ribs that are getting replaced in this area of the hull.   Halfway down the starboard side only another 20ft to go on the starboard side  Along way to go, not finding too much more than, i did not know was rotten, however I was able to find the positions of the main mast chain plates under the paintwork once it was removed. 2/3 of the way there and the end of the first day of sanding  The port side well underway on the second day when I ha...

Salvaging an old roof light from Chance when she was first built in1948

Image
This cabin roof light came from Chance, it is from a time when Chance first had electric lights fitted to her early in her long life. The bulb just needed its contacts cleaned up and a pair of short wires fitted to the blub socket and then contacted to a testing battery. Eureka , it works not bad for an early light bulb and light. So when it comes time to refit the lights in the boat this will be going back in the boat There are also a number of other  lights we have been able to salvage from Chance has we dismantled the interior of the boat.Many of the other lights are still being manufactured by Davey & Co. Some of the lights need a new glass which is readily available. from Davey & Co.  So all being well we will able to refit period lighting to the interior of Chance when it comes to that stage of the restoration. The only change to modern times will be a change in wiring the lights with modern wiring and possibly new bulbs to give better lighting below decks. ...

Our Son Michael hard at work sanding down the first lot of cupboard and locker doors and the main cabin to cockpit door and entrance hatches

Image
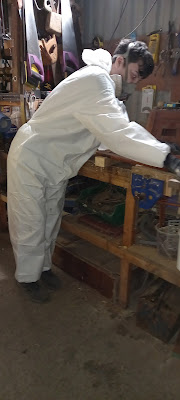
Micheal hard at work sanding down the doors to get them ready for the next five coats of 50% thinned varnish  All suited and booted and PPE and carefully sanding the doors down making sure to sand with the grain at all times and checking the smoothness of the varnish as he goes along  Always checking the smoothness and changing sandpaper as he goes along to maintain the sanding of the varnish  That first group of doors done and now to set them out to get them ready for the next coats of varnish to be applied   

Just revamped my patreon page https://www.patreon.com/Chance_1948 Life's a Gamble so let's take a Chance,

Over the weekend my wife Tricia and I  have been revamping my patreon page and given it a more catchy Banner. "Life's a Gamble so let's take a Chance." We have dreamt of owning a historic boat  like Chance since childhood. In 2021 the opportunity presented itself and was to good a chance to miss,  as we were able to take possession The James Silver "Western Isles" Chance.   Either of us have well paid jobs,but all life is a gamble so we took the chance on "Chance"  It would be great if you were able to join us as a pateron on our journey. As without you the journey would be so much harder. Although "Chance" is in a poor condition at the present time, her beauty shines through and will once again sail the high seas where she belongs. 

The smaller doors from Chance getting their first 5 coats of 75% thinned varnish and then getting rub down

Image
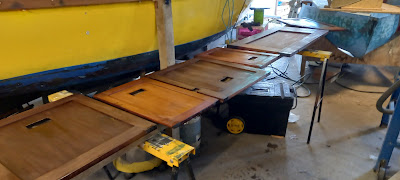
The smaller doors from Chances' interior set out and getting their first five coats of 75% thinned varnish As you can see in the photos the thinned varnish is soaking up a great deal on the first few photos as the wood is so dry.  The rich dark mahogany colour is starting to show through and when they are all finished  will transform the cabins on Chance The smaller doors all now sanded down ready to have their five coats of 50% thinned varnish after the May Day Holiday