Posts

Showing posts from January, 2023

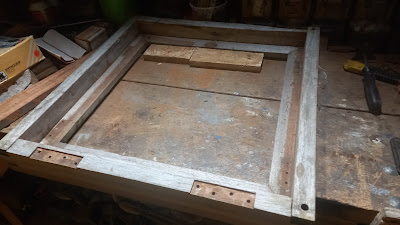
Also making a start on sorting out the Blakes Sea Toilet and the toilet seat which need the old screws removing out of the lid and seat and then sanding back and re-varnishing and the brass polishing and then lacquering

Image
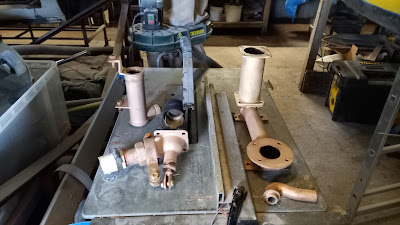
Now the bronze parts have been cleaned of all the old paint and are now washed with clean water and dried, We have to make up a list of the parts we need to restore the Toilet back into work order. The toilet seat is in need of a bit of attention, some of the old screws are rotten away and need to be drilled out and replace with new screws The seat and lid will need to have the old varnish removed and the brass hinge will need polishing and lacquering and there are a few bits which will need lacquering as well.   

Making a start on rebuilding the aft cabin roof hatch. A lot of repairs needed to the joints and a lot of sanding of all the surfaces.

Image
The inside of the hatch in need of sanding back to bare wood and to get rid of the greying of the bare teak. When the hatch is repaired it will all varnished all over to stop this happening again.  One piece of damage which will need careful cutting out and grading in a new piece of teak to make this good again The top will a good sanding and then sealing the area where the glass sits in the rebate A old method of keeping the hatch open for ventilation   The cover panels to keep the glass in position. the only item which is missing from this hatch like the hatch on the above the crew cabin in the forward end of the boat. Is the stainless rods to go over the glass so it will help stop someone putting their foot through the glass These panels will like the rest of the hatch be sanded back to get rid of the graying and the panel will be varnished to match the the rest of the varnished woodwork on the other hatches and the aft cabin sides and wheelhouse which should be varnished.  

Making new replacement parts for some of the smaller doors on Chance, these doors are the Galley upper locker doors above the cooker and worktop area.

Image
The old and new parts of the doors with the mortises cut on the new door  Marking off the new tenon half of the door frame  The new longer of the two parts that having to be replaced  Fitting well with just a little bit of adjustment on the centre panel to let the longer frame piece fit  Well fitting joint, just needs a bit of glue to make sure it stays in place  The shaped tenon part of the joint now just needs a pair of wedges made to fit down both sides of the joint against the walls of the mortise to lock the joint in position with a little bit of glue to help the joint stay in position  Unfortunately, had a little slip up cutting the slot in this part, now I have to make a new piece, However, I need the practice, ha,ha    

The Blakes Sea Toilet parts and the "A" Brackets vape blasted and all the paint removed ready to be cleaned and repainted with non toxic paint

Image
Having stripped down the parts of the sea toilet it was then time to vape blast the painted parts and remove all the old toxic paint from 70 years ago and apply a fresh coat of non toxic paint to the surfaces of these parts   The same goes for the "A" brackets for the propeller shafts, these will need to have the cutlass bearing removed and have new cutlass bearing inserted at a later date. They have come up well and it is a pity they are going to be underwater and out of sight. However, any toxic paint as now been removed. THe parts will just need a good cleaning to get rid of  any blast material left on the parts before they are dried and repainted again.